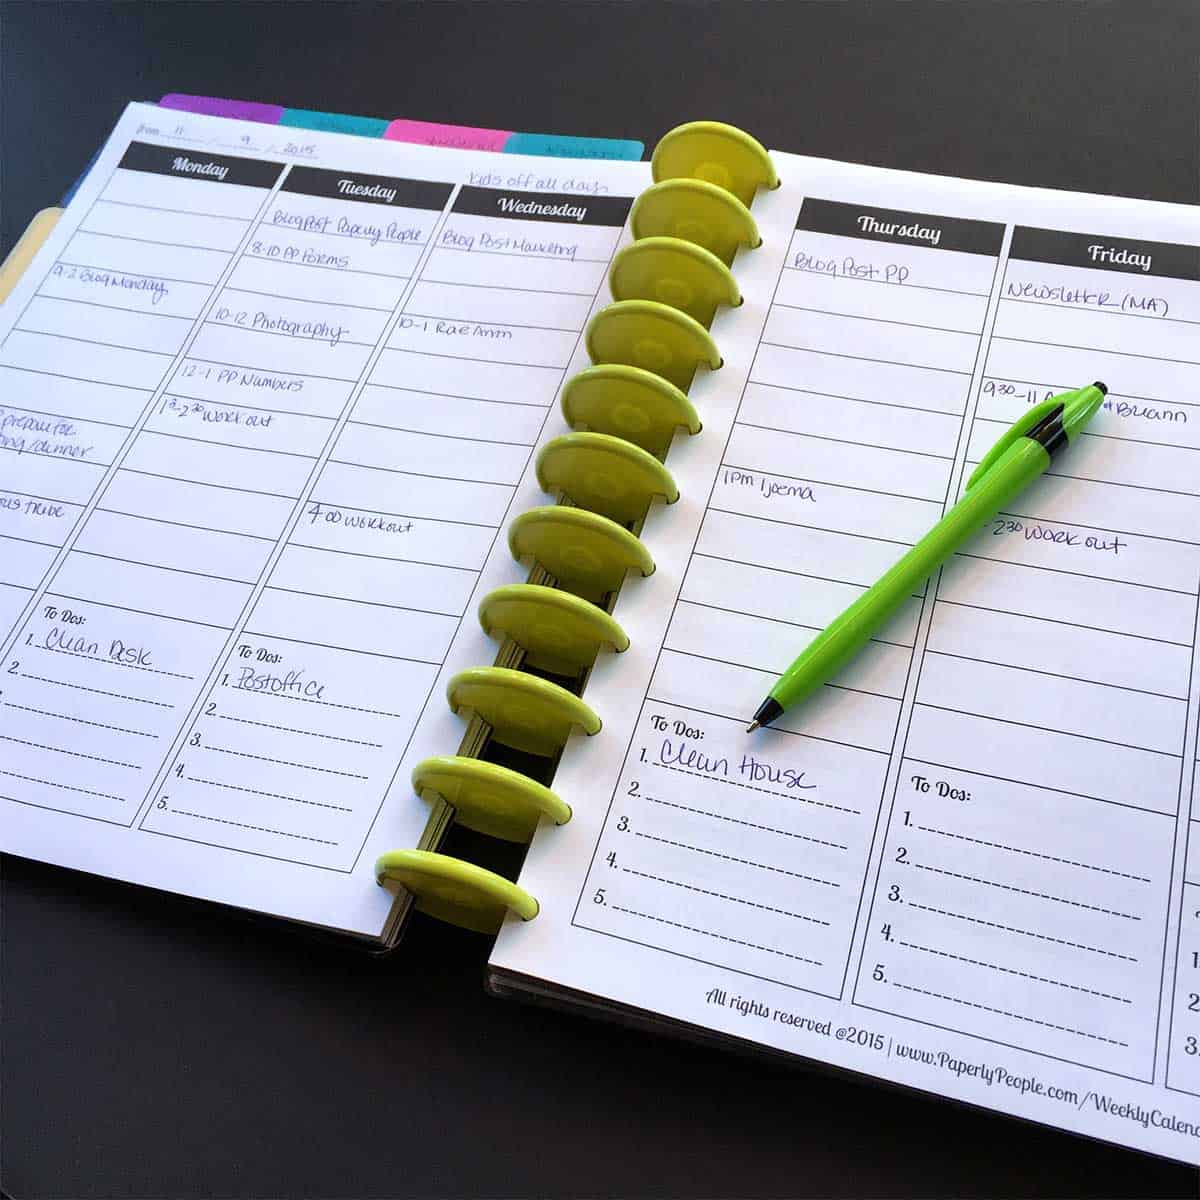
Today we are going to be talking about doing a weekly calendar spread that goes across two full pages of your planner.
I use an ARC Planner System from Staples because I like to be able to “fold over” my planner when I am not working on my calendar, but this calendar page works great in a three ring binder too!
Additional Resource: Should You Use A Daily, Weekly or Monthly Planner
Functionally, it shows an entire week at a glance.
Monday Through Sunday
This business calendar planner spread starts with Monday and ends with Sunday. If this is the first time you have used a planner like this, that is a tiny bit weird to get used to at first, but now that I have used this system for years, it seems like the way it should be!
You can plan out your whole week and get a good feel for everything you have going on and then have the weekend at the end.

To Do or Not To Do?
I am a “to dos” nut. I like to have areas at the bottom where I can plan out the things I have to get done but which are not time related. These are things like “go to post office” or “clean house”.
For me these are the things that can fall through the cracks since they don't have a scheduled time associated with them.
More Appointments
The gal I originally made this for has LOTS of appointments. She is a Mary Kay lady so she has parties, trainings, team calls and one-on-ones that she has to schedule during the day. She also attends a lot of networking events and socializes as part of her business model.
She did not want to have the bottom of her planner taken up with To Dos as she needed all the space for her appointments and scheduled time.
NOT Hour By Hour
I know that many planners have hour-by-hour time slots, but I find that I don't always use many of them and frequently I would actually like a little more room to add notes. For example, I wanted to have the address of the building where I would be speaking on Monday so I put the time and underneath where I was supposed to be going.
I do try to use some common sense when I am putting my appointments in. Working out and picking up my kids from school all happen around 1:30-3:00 so I put those later in the day leaving room above to add things in as I think of them!
Color Coding Your Calendar
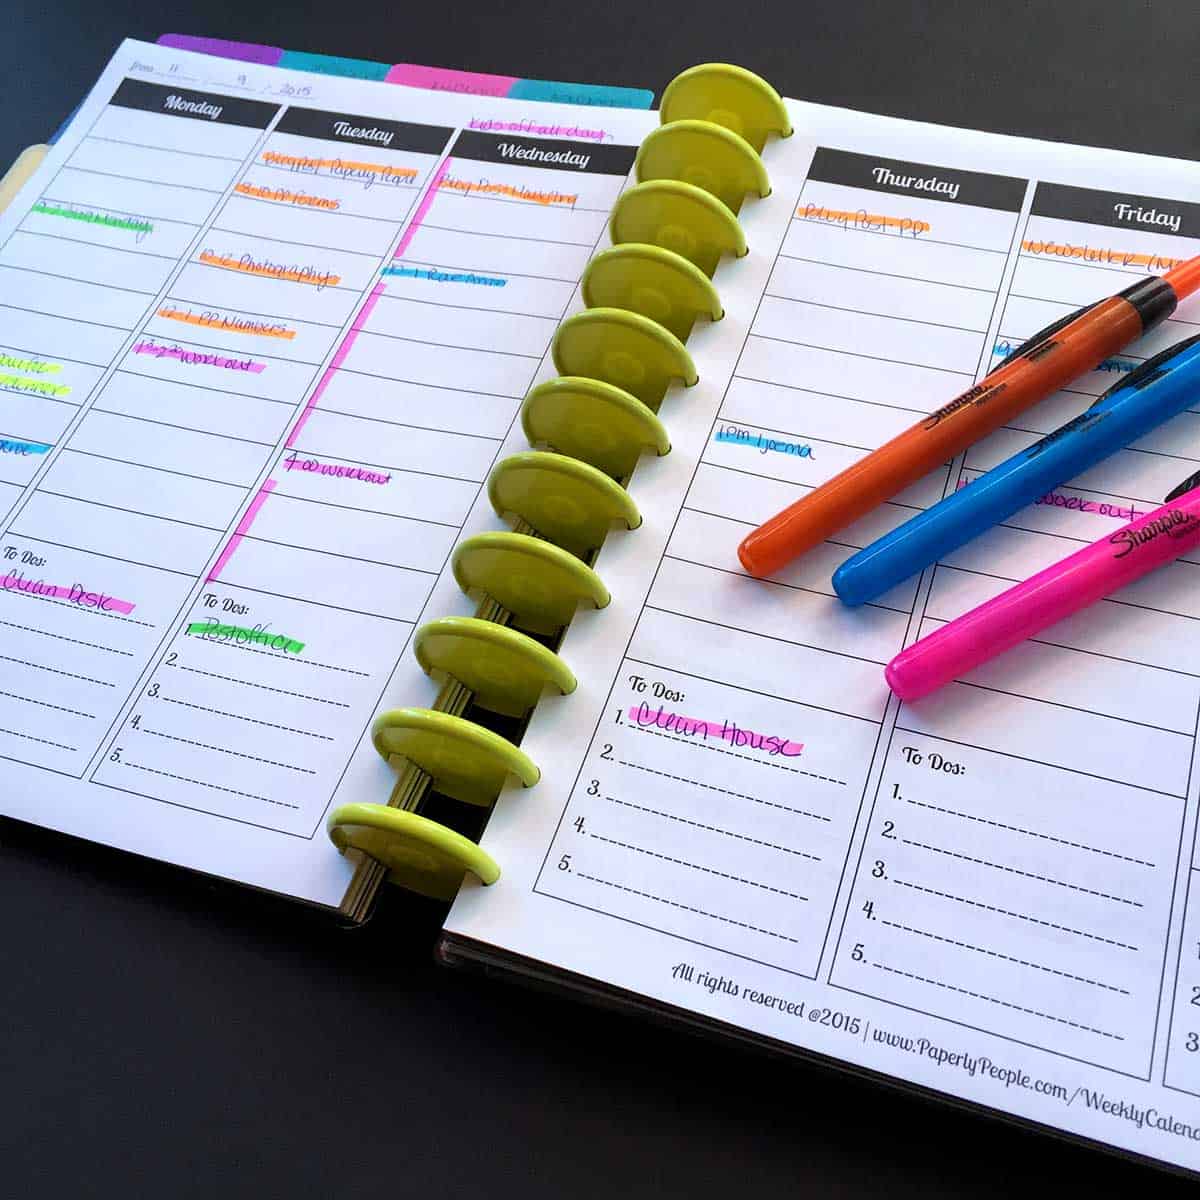
This little part is for visual people ONLY. I can figure out what I am doing so much better if I can color code my time. To do this I buy packs of Sharpie click highlighters. I know some gals use colored pens to write in their to dos.
This is my page color coded. I use:
- Pink for personal
- Blue for appointments with other people
- Orange for strategy (working on my business)
- Green for client work
- Yellow for administrative tasks
- Purple for training and taking classes
There is no hard and fast rule for which color should be which task. Use a system that feels right to you!
I know that many people people make a “cheat sheet” legend for a little bit and stick it on their planner so that they can remember which color goes with which task until they have it down pat!
All Day Colors
The last little bit is my secret trick. As you can see, on Wednesday I have a pink line running down the entire day. That is because my kids are off all that day so I have to know that I will be a little less effective and “worky”.
I also do this when I have travel time or an all day speaking event or conference.
Printing Tips
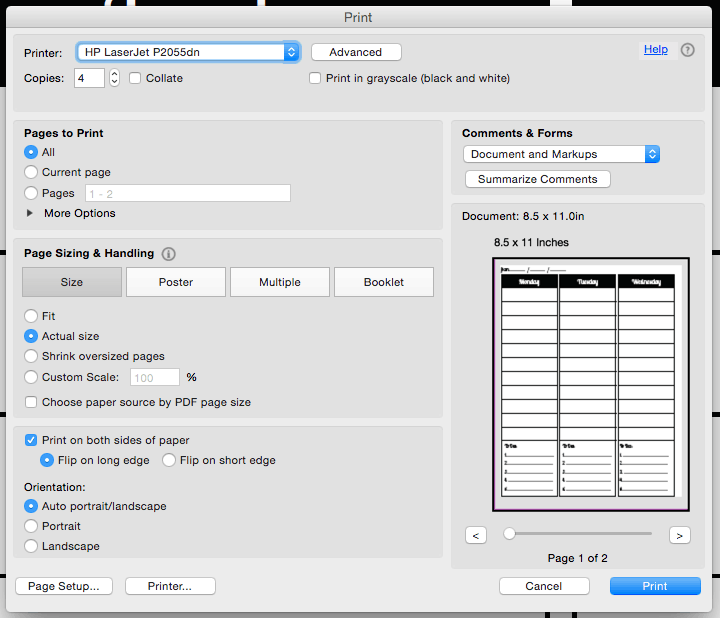
These pages are formatted to be printed at “actual size”. There are enough margins and it is formatted to have a little extra space in the middle to accommodate binder rings or ARC discs.
You can use the two sided “duplex” feature to make this work like a pre-printed binder, just print them out two sided and then be sure to punch the stack on the side that has the wider margin.
Here are the print settings that I use for my duplex printer:
Select:
- # of copies (the front and the back of each stack will be “extra” without a mate)
- print all
- actual size
- print on both sides of the page (flip on long edge)
- auto portrait


 Tara’s “tell it like it is” personality combined with her 100 miles per hour presentations have earned her the title “The Queen of Marketing Ahhh’s” from her raving fans. Check out her marketing courses and products at her Etsy Store,